About me

Mijn foto
I've changed my life around and now I am enjoying The Lighter Life. I love cooking and especially baking lovely desserts, but I wanna stay away from little no-no's like too much sugar and fat. I live in Belgium where the 'low-carb and low-fat movement' is just starting to begin so I found myself looking for recipes with easy to find ingredients and metric cooking measurements. Since they were hard to find, I decided to make my own! My desserts may never win beauty contests, for baking with bio ingredients will mostly give you flat cakes and pies. But lord will they win over your taste buds and still have you fitting into your skinny jeans. I invite you all to try out some recipes, adapt a couple where you see fit and above all, learn to enjoy the lovely taste of freshly baked, healthy goods.
Posts tonen met het label sweetener. Alle posts tonen

dinsdag 29 oktober 2013

Almond cookies with chocolate

NO ADDED FAT!

I can't write it any bigger without it being stupid but that is what makes these cookies so great. They are low in fat, yet very tasty and sturdy so you can take them along and enjoy them the entire day.

I was gonna take pictures, but then it got dark, and then  I forgot....and then I ate them all.
Woops :D

Ingredients:

For the cookies:
200 gr ground almonds (almond flour)
100 gr icing sugar
1 tsp liquid honey
4 egg whites
A pinch of salt

For the chocolate:
4 egg yolks
1 tbsp liquid sweetener
2 tbsp no-added sugar cacao powder

Way to do it:

  1. We start with the cookies. Add the almond flour, honey and icing sugar in a bowl.
  2. With a fork, lightly wish 2 egg whites until the liquid turns white. Add it to the almonds and stir with a wooden spoon.
  3. Whisk the remaining 2 egg whites with a pinch of salt until you can turn the bowl upside down. Then add to the batter and gently fold it in.
  4. Line a baking tray with baking paper and evenly place out the dough. Mine are about a full tablespoon each. Bake for 10 minutes at 180degrees C.
  5. Now for the chocolate. Add all the ingredients to the 4 egg yolks and whisk. Let rest until the cookies come out.
  6. When the cookies have baked for 10 minutes, take them out and add a dollop of chocolate mixture to each cookie. The chocolate will run over the cookie making it look good but not 'too perfect'. I don't do pretty pretty, I do yummy yummy!
  7. Place the tray back into the oven and let bake for another 5 minutes. 
  8. When they are done, let them cool before you move them to a plate or stuff them into your mouth.

Enjoy
xx

woensdag 9 oktober 2013

Lemon Bars with Cream Cheese

Hi everyone.

I've been wanting to make lemon bars for so long, but I never found a recipe that ticked off all my criteria. For a recipe to be Stevie Friendly, it needs to be

- easy and no fuss
- not drenched in bad fat or loaded with sugar
- not take to long because you know I have no patience

and

- it must not make a mess of everything because I hate, hate, HATE doing dishes.

So, I simply decided to dive in, head first, and create my own lemon bars.
And I'm so happy I did.


Ingredients:

For the base:
150 gr flour
100 gr soft coconut butter (normal butter is fine too)
A pinch of salt
2 tbsp sugar
2 tbsp cold water
1 tsp lemon juice

For the filling:
3 tbsp low fat cream cheese
2 eggs
2 tbsp liquid sweetener
Juice of 1 lemon
100 gr flour


Way to do it:

  1. We start with the base. Combine all dry ingredients in a bowl and stir with a spoon to combine. Add the coconut butter and use your hands to 'melt' it into the mixture. It will become very crumbly and dry. Add the lemon juice and water and use that liquid to form a dough. Roll the dough into a ball, put it in cling foil and let rest in the fridge for at least 30 minutes.
  2. Now we make the filling. Add the cream cheese, eggs, liquid sweetener and lemon juice into a bowl and whisk until combined. Add the flour and make sure there are no lumps left. It will be very liquid but don't worry, that way our crust will soak it all in. Leave it into the fridge until you are ready to use it.
  3. After the crust has rested for 30 minutes, take it out and line a baking tray with baking paper. Roll out the dough and bake in a pre-heated oven on 180degrees Celsius for about 10 minutes.
  4. Take the baking tray out and pour the filling over the crust. Bake again for another 10 minutes.
  5. Take out of the oven and let them cool before you cut them. Transfer to a plate and they are best if you keep them in the fridge.
And these people, are no fuss, no muss, deliciously low sugar Lemon Bars.

I must admit, you can't call these low in fat...compared to stuff you would buy in the store yes, but not to other stuff you can find on my website. However, I did use coconut butter and some sources say it's the 'healthiest' butter there is. But it's still butter off course, this isn't a perfect world :-(


It was my first time making these, so it's still a work in progress. Next time, I'm going to add some cacao powder to the base and I'll prob add some more lemon juice because in my opinion, they could be a little more sour.

Keep checking back for new recipes and let me know what you think.

Enjoy
xx
zaterdag 31 augustus 2013

Soy cake with crumble base

It's been a while but I'm back with a new recipe , tried and tested (much to my own enjoyment) and ready to be baked in houses all over the country.

I present you, my low-fat, low sugar, yogurt cake with a crumble base.


Did I read low fat? 
Granted, there is butter in the base, but apart from that, the yogurt and milk add up to about 5g of fat....and that's the good kind of fat people because if you choose soy based products, you ingest the good saturated fats...the one the body just simply needs.

Did you say low sugar?
Two tablespoons of sugar go into the base. The yogurt and milk are naturally sweet and the additions of two tablespoons liquid sweetener just gives all you sweet tooths out there (I know I'm one of 'em) that extra satisfaction.

Why the crumble base?
You can use store-bought cookies and mash them up to make a crumble base. But this way is just way more fun. Get your hands dirty and start kneading that dough. Also, store-bought cookies are, apart from high in bad fat, also filled with extra additives to make them look good and hold their color. Therefore, take the extra ten minutes and just make it yourself and that way, you know exactly what went into them.


Ingredients:

For the crumble:
100 gr soft butter, cut into cubes
150 gr white flour
2 tbsp sugar
pinch of cinnamon
pinch of salt
1 tbsp cold water

For the filling:
250 gr plain soy yogurt (I used my all-time favorite Alpro Soy)
100 ml Light Vanilla Soy drink
2 tbsp liquid sweetener
2 eggs
100 gr buckwheat flour

Way to do it:

  1. Sift the white flour in a bowl and add sugar, cinnamon and the salt and give it a little mix until they are combined. Add the sugar and use your hands to knead the dough. It needs to form a nice consistent ball. Not too sticky but definitely not too crumbly. Add a tbsp of water if you feel like the dough needs it to stick together.
  2. Fold the ball of dough into a tinfoil and let it rest in the fridge for about 30 minutes.
  3. To make the filling, add all it's ingredients in a bowl (use the one from the dough, nobody likes doing dishes right?) and mix until air bubbles start showing. Place in the fridge for at least 10 minutes.
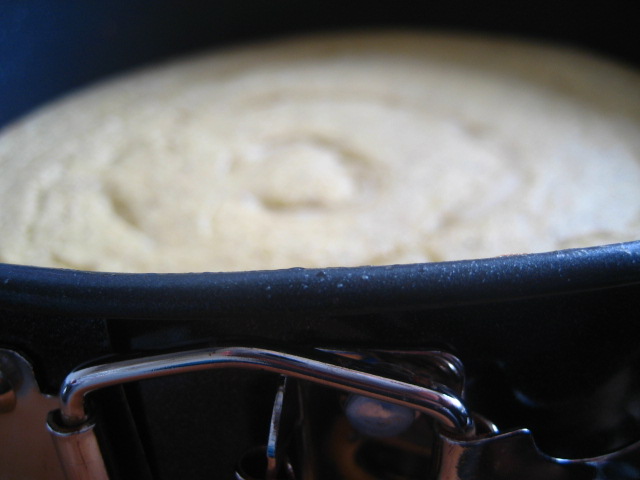
  4. Take a round baking tray and gently oil it. Line the tray with your dough. Pour in the mixture and place into a preheated oven at 200 degrees C for about 20 minutes.
  5.  

Take the cake out of the oven if the outsides are set but the middle is still a little bit wobbly. Let it cool completely (COMPLETELY Stevie, have some patience) before you take it out of the tin.  

You can choose how you wish to decorate the cake. I saved some pieces of the dough and rolled them into long strips to make the circle design. It's your cake and your creation, so do whatever you like. You could even write out a person's name if you are making this cake as a birthday gift.

I enjoyed mine with a cup of coffee in my new favorite mug :)


Enjoy
xx

zondag 28 juli 2013

Blueberry crumble bars

Feast your eyes on this!


Doesn't it look wonderful? This, my sweet friends, is what happens when it's sunny and with bikini season at the back of your mind, you start craving something sweet. This recipe, although light in calories, isn't very light on the stomach so you only need a small piece to get filled up.

I got the original recipe here, but for added healthiness, I substituted most of the sugar by honey and sweetener. I also chose to use half white flour, half buckwheat, because the good nutrition of buckwheat strengthens the body and upps your immune system. Granted, there is some butter here and if I make new versions of this recipe, I'm going to try and cut down some of the butter. But for now, just marvel at their deliciousness.


Ingredients:

100gr white sugar
2 teaspoons liquid sweetener
1 teaspoon baking powder
150gr white all-purpose flour
150gr buckwheat flour
200gr soft butter cut into small pieces
1 egg
a pinch of salt

400 to 500 gr fresh blueberries
1,5 tablespoons honey
50gr white all-purpose flour

Way to do it:


  1. Preheat the oven to 200 degrees C and grease your baking pan. Use any which one you like. I used a big, round, spring form but if you wanna make bars, I would suggest a square one.
  2. In a big bowl (you need the extra space for the mixing) mix 150gr white four, 150gr buckwheat flour and baking powder. Add in the egg, liquid sweetener, salt and butter. Use your hands to knead the dough into a big ball. This could take some time but it's really worth it in the end.
  3. Take half of the dough and spread it out evenly into your prepared tin. Pad it down all the way to the sides.
  4. In a new bowl, sprinkle blueberry's with the honey and then add the flour. Turn the blueberry's over so that the honey and flour sticks to them. Then spread them out evenly over your batter.
  5. Take the remainder of the dough and cover up all the berry's. Again, take some time to cover all of them, basically sealing them in.
  6. Bake for 30mins at 200 degrees C and try to show restraint once the amazing smell of the baked fruit hits your nose.
  7. Take out of the oven when the top turns slightly brown and leave to cool before cutting into bars or squares, as you prefer. They keep best in the refrigerator and they are even better the next day.


You can also leave the cake/pie/bars, whatever you wanna call it, into it's original form and serve as a lovely summer alternative to fattening pies and cakes. The crust, once cooled, cuts well so you can serve a nice piece of pie and maybe even add some lime or lemon sorbet for the ultimate summer dessert!


Enjoy,
xx

maandag 1 juli 2013

Healthy Banana Oatmeal Cookies

Cookies, again...I know. But these are so delicious and healthy, I need to share.


I've been wanting to make oatmeal cookies for some time now, but after browsing the internet, I just couldn't find a recipe I liked...so I set shop in the kitchen and just went for it. It's amazing these worked out so well, because I just sort of winged it. And thank god for that because this recipe is amazing.


My new favorite cookies...until the next batch of crazy improv baking comes along :D


 Ingredients:

70 gr soft butter
50 gr grated coconut (coconut flour, coconut flakes, it's all the same thing)
1,5 tsp baking powder
1 ripe banana
2 tbsp red fruit jam
1 tbsp liquid sweetener
2 eggs
70 gr buckwheat flour
150 gr oatmeal

Way to do it:

  1. Put the soft butter in a bowl and mix in the grated coconut. Add the buckwheat flour and baking powder.
  2. Add the eggs and mix well.
  3. Add the ripe banana and mash it. Then add the jam and the sweetener. You could choose to add more sweetener and omit the jam or the other way around, depending on which you prefer. I prefer to keep it as natural as possible to I went with more jam.
  4. Mix everything well until the batter becomes kind off fluffy and then fold in the oatmeal.
  5. Divide on a tray lined with baking paper and put in a preheated oven and bake at 170degrees C for about 12 minutes.

  6. While they are cooking, these babies will make your house smell amazing. The aroma of the baked banana is just...mmmm. You'll have husband and kids running for the kitchen.

    The cookies do have some fat because of the butter, but you've gotta give a little to get a lot! And in this case, it's taste. What's a little bit of butter when you get the healthy benefits of banana, oatmeal, coconut and buckwheat all in one bite? I'm telling you, keep this recipe in your favorites bar because you'll be making them a lot.

    Enjoy
    xx


zaterdag 11 mei 2013

Litlle Coconut Bites

Hey my sweet-loving friends. I hope you have enjoyed my recipes so far, so here's a new one. At about 14g of carbs for the entire recipe, it's a god sent. These little coconut bites are lovely with a cup of tea or coffee and might just be that little easy solution to your sweet cravings.


Ingredients:

4 egg whites 
2 teaspoons liquid sweetener
150 g coconut
A few drops of vanilla essence


Way to do it:

  1. Seperate the egg whites from the yolks. We won't need the yolks so either you keep them for a later recipe or you throw them out.
  2. Add the sweetener to the whites and heat them up in a pan but don't let them boil. Stir all the while until it's one nice blend.
  3. Add the coconut to the mixture and keep stirring.
  4. Last, you add a few drops of vanilla essence, just for extra taste.

Gently, form little balls of the batter with your hand. Watch out, they are very fragile until you cook them.

Lay the balls out on a baking tray and spread them out. Don't make them too big. Bake at 180 C for about 10 minutes.

This recipe is very, and I mean VERY low in carb...and...in fat! So two for the price of one! Easy, only good coconut fat and very low carb...damn life can be good!


Enjoy
xx

donderdag 9 mei 2013

Icetray Chocolate Base Cheesecakes

A low carb treat for those warm summer days you can make in about 5 minutes? It must be magic. Put your ice cube tray to good use and make your own ice bon-bons. You can substitute the Greek yogurt for cream cheese, but it's basically the same. I made mine using Alpro Soya plain yogurt because I love the taste. You can make these with any yogurt or cream cheese you like. Play around with taste and you'll always have a great outcome.


What's great about this also, is that you can make small sizes. So make a tray with yogurt, make one with vanilla pudding... the choices are endless!

Ingredients:

125 ml non-fat plain Greek yogurt or Alpro Soya Plain yogurt
1 teaspoon liquid artificial sweetener
60 g dark chocolate

Way to do it:

  1. Blend the yogurt and sweetener and set aside.
  2. Gently melt your chocolate in the microwave or be a real chef and do it au bain marie.
  3. Coat a pre-chilled, clean ice cube tray with some vegetable oil. Let the excess drain out.
  4. Using a spoon pour the chocolate into each ice cube mold and make sure to fully coat the bottom using your spoon.
  5. Fill each ice cube mold with the yogurt filling.
  6. Top with a dollop of chocolate.
  7. Place in the freezer for 2-3 hours.


To eat, remove from freezer and then, gently twisting the ice cube tray, remove as you would an ice cubes. Eat immediately.


Depending on which ingredients you use, these babies are so low in carb that feeling guilty is not necessary. Mine come out to not even 1 carb per cube.

I hope you like them and let me know what you think!

Enjoy
xx

dinsdag 12 maart 2013

Chocolate Chip Coconut Cookies

Hi Everyone,

I just can't stop making cookies!
I love them with a cup of tea to end a stressful day or with a cup of coffee in the morning for that sweet kick-off. This time, I shelved my almond and went to work with coconut and man did that work out.
If you try only one thing on this entire blog, try this! They are easy to make and low in carb.

Ingredients:

2 large Eggs
3 tbsp low fat cream cheese
150 gr soft butter
a tsp vanilla extract
4 tbsp sweetener (or to your taste)
120 gr shredded coconut
1 tsp baking powder
dash of salt
60gr melted dark chocolate( the less carb the better. Mine was 16gr per 85gr
60gr dark chocolate chopped

How to do it:


  • Preheat over to 170 degrees C.
  • In a bowl add butter, cream cheese and sweetener. Then add the eggs, vanilla extract and the melted chocolate.
  • Add the baking powder,salt and shredded coconut.
  • Finally, gently stir in the chopped chocolate

  • I made 11 big cookies with my dough. The dough is strong enough for you to roll little balls with, making a nice shaped cookie. Place them evenly on a baking tray covered with baking paper. Bake for about 15min at 170 degrees C. During the baking, the cookies will loose some fat. Don't worry about that. It's normal and it results in an even 'healthier' cookie.

    Afterwards, gently move them to a plate to cool.

    Depending on how big you make them and which ingredients you use, this entire recipe contains about 22gr of carbs. So that's about 2 gr of carb per cookie. Still way less than any cookie you can buy in the shops. And less expensive. Besides, they make your house smell amazing all day.

    Do leave them overnight if you can resist their smell because I found the taste and texture is better the next day.

    Note: You can also add some white chocolate chunks or replace the melted chocolate with non sweetened cocao powder for a cookie with even less carbs. Use this recipe as a base for further recipes and add maybe maple sugar for a sweet cookie, or more sugar and vanilla for a rich vanilla cookie. Experiment, you know I will....

    Enjoy
    xx

    zondag 3 maart 2013

    Almond Macadamia Cookies

    Hi Everyone,

    I'm back with a new recipe!
    After my hazelnut cookies really did the trick of keeping my sweet cravings in check, I decided I needed more! I made another batch of cookies because I love how they are so low in carb and I don't have to feel bad for indulging.
    My cookie routine: I have one in the morning before my meals with a nice cup of strong coffee and in the evening, I have another one (or two...) with some lemon tea and really, it doesn't even feel like I'm dieting.

    Ingredients:

    2 large Eggs
    150 gr butter
    a tsp vanilla extract
    5 tbsp sweetener (or to your taste)
    200 gr Almond flour
    1 tsp baking powder
    dash of salt
    60gr Macadamia nuts, chopped

    How to do it:

  • Preheat over to 190 degrees C.
  • Separate the whites from the yolks and beat the whites stiff.
  • In the bowl with the yolks add the vanilla extract and butter.
  • Add the sweetener and mix again.
  • Add the baking powder,salt and almond flour.
  • Gently fold in the egg whites. This will give your cookie it's height.
  • Finally, gently stir in the chopped nuts

  • Divide the dough evenly into about 15 little heaps of dough and place them on a cookie sheet. Make sure they are far enough apart because they will spread out a little. Bake for about 12 minutes at 190 C for soft cookies, go to about 17 minutes for crunchier ones.

    Afterwards let them cool before you move them to a plate.


    Depending on how big you make them and which ingredients you use, this entire recipe contains about 17gr of carbs. So that's about 1,2 gr of carb per cookie!

    Leave them overnight because I found the taste and texture is better the next day.

    Note: You can also add some white chocolate chunks but I couldn't find any with reduced calories. Now I found some on so I'll be back soon with some white chocolate creations :D

    Note 2: For added yummyness, you could smear the top of the cookies with some low sugar jam. Only do so right before you're about to eat them because otherwise, they will make the cookie too mushy.


    Enjoy
    xx

    zaterdag 23 februari 2013

    Hazelnut Cookies

    Ingredients:

    2 large Eggs
    150 gr butter
    a tsp vanilla extract
    3 tbsp sweetener
    120 gr Hazelnut Butter (you can use peanutbutter if you prefer)
    1 tsp baking powder
    dash of salt
    40gr of Stevia dark chocolate chunks (try and find the one with the less carbs, I found mine in a bio shop)

    Way to do it:

    1. Preheat over to 190 degrees C.
    2. Separate the whites from the yolks and beat the whites stiff. In the bowl with the yolks add the vanilla extract and butter.
    3. Add the sweetener and mix again.
    4. Add Peanut butter and mix till well combined.
    5. Add the baking powder and the salt. Then you add the chocolate chunks
    6. When your batter is done, gently fold in the egg whites. This will give your cookie it's height and yummyness
    7. Divide the dough evenly into about 15 little heaps of dough and place them on a cookie sheet. Make sure they are far enough apart because they will spread out a little. Bake for about 15 minutes at 190 C
    Afterwards let them cool before you move them to a plate.


    Depeding on how big you make them and which ingredients you use, this entire recipe contains about 20gr of carbs. So that's about 1,5 gr of carb per cookie!

    Enjoy
    xx

    Low Carb Red Velvet with icing

    Hi everyone, here goes for my first recipe!

    2 Weeks ago on friday, Me, my brother and my sister had a sibling day planned. We went to the museum and afterwards we played boardgames at my brother's house. Good ol' family bonding time.

    However, I knew it would be hard for me to say no to delicious snacks sush as cookies and chips...so I made my own snacks. I adapted the red velvet recipe from my Hummingbird Bakery cookbook to make it very low in carb. Even with the added icing, it's only about 2 carbs per cupcake. So don't be shy and grab another one before they're all gone.

    I wouldn't say they are as good as regular 'real' red velvet cupcakes, otherwise life wouldn't be fair. But my brother did eat about 5 of them so they couldn't be bad right :D

    Ingredients:

    for the cupcake
    100ml almond milk
    120g butter
    About 3 tbsp sweetener
    2 large eggs
    20 g cocoa powder
    40ml red food coloring (doesn't add to the taste but it can't be red velvet without adding a little red)
    A few drops vanilla essence
    300 g almond flour
    Half a tsp of baking powder
    A finch of salt to make the baking powder work
    for the icing
    250g cream cheese (try and look for the one with the least carbs. I used a bio non-fat one)
    3 tbsp sweetener

    Way to do it:

    Pre-heat your oven to 190 C and place your cupcakes molds in a special cupcake tin. That makes them easier to carry and they will keep their lovely shape.
    Use a mixer to mix the butter and sweetener. To this you add your eggs and mix again.
    Add your coca, red food coloring and the vanilla essence.
    Now you can add in the almond flour and the milk.
    At the very end you add the baking powder with a pinch of salt. Mix everything very well for a couple of minutes.
    Divide evenly over the cupcake papers and bake in the oven for about 18 to 20 minutes.
    While they are baking, you can make the icing. Simply add the sweetener to the cream cheese and mix it till it's smooth.
    When the cupcakes are done, let them cool completely and then add the icing. You can decorate with a dash of cocoa powder if you please.

    Note: all sweetener is different so try as you go. Too much sweetener will make your creation taste too 'chemically' so I would advise you use my amounts as guidelines but see what works for your sweetener.

    Enjoy
    xx