About me

Mijn foto
I've changed my life around and now I am enjoying The Lighter Life. I love cooking and especially baking lovely desserts, but I wanna stay away from little no-no's like too much sugar and fat. I live in Belgium where the 'low-carb and low-fat movement' is just starting to begin so I found myself looking for recipes with easy to find ingredients and metric cooking measurements. Since they were hard to find, I decided to make my own! My desserts may never win beauty contests, for baking with bio ingredients will mostly give you flat cakes and pies. But lord will they win over your taste buds and still have you fitting into your skinny jeans. I invite you all to try out some recipes, adapt a couple where you see fit and above all, learn to enjoy the lovely taste of freshly baked, healthy goods.
Posts tonen met het label ingredients. Alle posts tonen

zaterdag 22 juni 2013

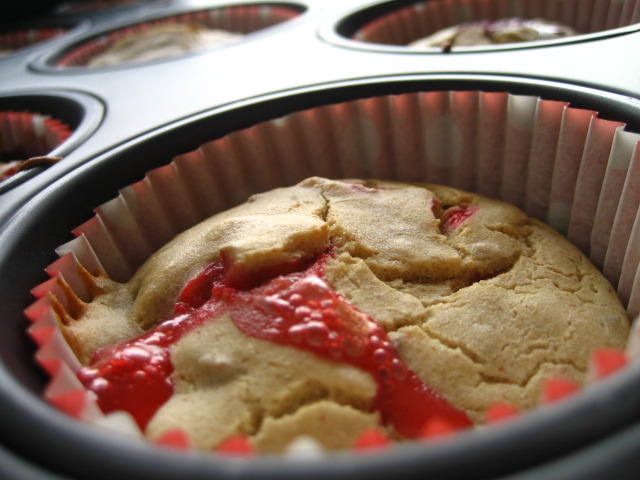
Straw- and blueberry buckwheat muffins

No muss, no fuss, just easily made stuff! I bring you a healthy muffin you can whip up in about 20 minutes...and that's counting baking time.

This will be my second recipe with buckwheat after the first one went down so great. My scones were great, and these muffins might even be better!

Browsing through the ingredients, you might notice I didn't use any...let me repeat, ANY butter. I wanted to make a muffin very low in fat so I wouldn't have to feel bad when I wanted a second one...or third...or basically finish the entire batch in 1 day. Yes...I can't control myself from time to time.

Because these babies hold no fat, they are dense and won't come out of paper muffin cups very easily. Therefor I would suggest you make these in silicone cups which you can lightly coat in vegetable oil.

Eat it with a dollop of Greek yogurt or with some agave sirup drizzles over it or just be lazy and eat it like it is, you won't be disappointed either way.

Ingredients:

200gr buckwheat flour
2 eggs
150 ml low fat plain yogurt
1 tsp vanilla essence
3 tbsp liquid sweetner
3 tbsp flax seeds 60 gr strawberries
60 gr blueberries

Way to do it:

  1. In a bowl, mix all ingredients apart from the fruit. Mix until everything is combined. It will be a thick, glue like batter.
  2. To easily remove the crown of a strawberry, use a straw, it's such a great trick. Cut up the strawberry in pieces and add, with the blueberry, to the mix. Be careful not to smash the fruit as you mix the batter. I would suggest folding them in with a spoon.
  3. Divide over your cups. It's okay to fill them up. The batter doesn't rise much.
  4. Bake for 15minutes in a 200degrees oven.
  5.  
    I love how the strawberry and blueberry make for different colors. So cute and colorful and full of flavour!

    Enjoy
    xx

zondag 3 maart 2013

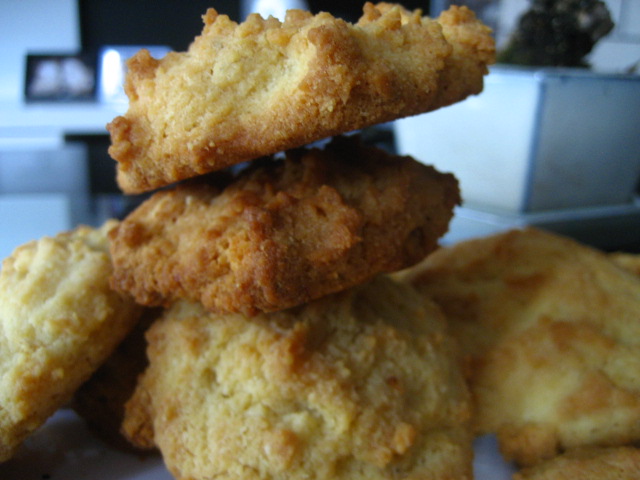
Almond Macadamia Cookies

Hi Everyone,

I'm back with a new recipe!
After my hazelnut cookies really did the trick of keeping my sweet cravings in check, I decided I needed more! I made another batch of cookies because I love how they are so low in carb and I don't have to feel bad for indulging.
My cookie routine: I have one in the morning before my meals with a nice cup of strong coffee and in the evening, I have another one (or two...) with some lemon tea and really, it doesn't even feel like I'm dieting.

Ingredients:

2 large Eggs
150 gr butter
a tsp vanilla extract
5 tbsp sweetener (or to your taste)
200 gr Almond flour
1 tsp baking powder
dash of salt
60gr Macadamia nuts, chopped

How to do it:

  • Preheat over to 190 degrees C.
  • Separate the whites from the yolks and beat the whites stiff.
  • In the bowl with the yolks add the vanilla extract and butter.
  • Add the sweetener and mix again.
  • Add the baking powder,salt and almond flour.
  • Gently fold in the egg whites. This will give your cookie it's height.
  • Finally, gently stir in the chopped nuts

  • Divide the dough evenly into about 15 little heaps of dough and place them on a cookie sheet. Make sure they are far enough apart because they will spread out a little. Bake for about 12 minutes at 190 C for soft cookies, go to about 17 minutes for crunchier ones.

    Afterwards let them cool before you move them to a plate.


    Depending on how big you make them and which ingredients you use, this entire recipe contains about 17gr of carbs. So that's about 1,2 gr of carb per cookie!

    Leave them overnight because I found the taste and texture is better the next day.

    Note: You can also add some white chocolate chunks but I couldn't find any with reduced calories. Now I found some on so I'll be back soon with some white chocolate creations :D

    Note 2: For added yummyness, you could smear the top of the cookies with some low sugar jam. Only do so right before you're about to eat them because otherwise, they will make the cookie too mushy.


    Enjoy
    xx

    zaterdag 23 februari 2013

    Crazy Cauliflower Chocolate Brownies

    There are those out there on the lovely internet that are truly magnificently insane. And amongst them is this woman. She has a recipe, so crazy that many would shy back to try it. But I'm telling you, you simple have to try it. It takes a little bit more work than I'd normal be up for but it's so worth it!

    When you are craving, and you need that little bit of chocolate but without messing up your diet, this is the way to go. You can find the original recipe here but below is my version.

    Ingredients:

    250 gr raw cauliflower
    150 ml almond milk (I used Alpro Soya)
    80 gr dark chocolate (I got Stevia chocolate at the local Bio shop)
    100 gr cup butter
    3 tbsp cream cheese
    3 eggs
    100 gr ground almonds (almond flour, also at the local Bio shop)
    4 tsp cocoa powder
    3 tbsp sugar equivalent
    1 tsp baking powder
    pinch of salt to make the baking powder work
    50 gr coconut flour(optional)
    A few drops op Vanilla essence (optional)

    Directions:

    1. Puree your raw, washed, cauliflower and add to it the almond milk. Make sure its completely smooth and that there are no chunks.  
    2. Melt the butter and chocolate. I just did it in the microwave. Less clean-up after :D   
    3. Mix the melted butter and chocolate with the cauli and milk mixture.  Give it another good blend.  
    4. Add the eggs and again stir it till everything's mixed.  
    5. Now one by one, add all of the dry ingredients into the bowl with the mixture.  Stir after each addition.
    6. I also added about 3 drops of vanilla essence. You don't have to, but I found it gave the brownies an extra 'sweet' flavor without adding extra carbs.
    Grease a baking pan and spread the batter evenly into it.  Bake in a pre-heated oven at 180 degrees C for about 35 minutes. Near the end, poke it with a knife. If the knife comes back clean, then you have a winner! Cut in cute little squares.
    Note: They are quite brittle when they are still warm so I'd advise you to let them cool before you cut.

    And there you have it, insane isn't it?
    Don't tell people what's in them. Wait till they compliment you on how the brownies taste and then tell them they that just ate vegetables. They won't believe you... but you and I now know that it's true.

    Sorry I didn't include pictures. They were eaten before I had the change :D

    Enjoy
    xx

    Low Carb Red Velvet with icing

    Hi everyone, here goes for my first recipe!

    2 Weeks ago on friday, Me, my brother and my sister had a sibling day planned. We went to the museum and afterwards we played boardgames at my brother's house. Good ol' family bonding time.

    However, I knew it would be hard for me to say no to delicious snacks sush as cookies and chips...so I made my own snacks. I adapted the red velvet recipe from my Hummingbird Bakery cookbook to make it very low in carb. Even with the added icing, it's only about 2 carbs per cupcake. So don't be shy and grab another one before they're all gone.

    I wouldn't say they are as good as regular 'real' red velvet cupcakes, otherwise life wouldn't be fair. But my brother did eat about 5 of them so they couldn't be bad right :D

    Ingredients:

    for the cupcake
    100ml almond milk
    120g butter
    About 3 tbsp sweetener
    2 large eggs
    20 g cocoa powder
    40ml red food coloring (doesn't add to the taste but it can't be red velvet without adding a little red)
    A few drops vanilla essence
    300 g almond flour
    Half a tsp of baking powder
    A finch of salt to make the baking powder work
    for the icing
    250g cream cheese (try and look for the one with the least carbs. I used a bio non-fat one)
    3 tbsp sweetener

    Way to do it:

    Pre-heat your oven to 190 C and place your cupcakes molds in a special cupcake tin. That makes them easier to carry and they will keep their lovely shape.
    Use a mixer to mix the butter and sweetener. To this you add your eggs and mix again.
    Add your coca, red food coloring and the vanilla essence.
    Now you can add in the almond flour and the milk.
    At the very end you add the baking powder with a pinch of salt. Mix everything very well for a couple of minutes.
    Divide evenly over the cupcake papers and bake in the oven for about 18 to 20 minutes.
    While they are baking, you can make the icing. Simply add the sweetener to the cream cheese and mix it till it's smooth.
    When the cupcakes are done, let them cool completely and then add the icing. You can decorate with a dash of cocoa powder if you please.

    Note: all sweetener is different so try as you go. Too much sweetener will make your creation taste too 'chemically' so I would advise you use my amounts as guidelines but see what works for your sweetener.

    Enjoy
    xx