About me

Mijn foto
I've changed my life around and now I am enjoying The Lighter Life. I love cooking and especially baking lovely desserts, but I wanna stay away from little no-no's like too much sugar and fat. I live in Belgium where the 'low-carb and low-fat movement' is just starting to begin so I found myself looking for recipes with easy to find ingredients and metric cooking measurements. Since they were hard to find, I decided to make my own! My desserts may never win beauty contests, for baking with bio ingredients will mostly give you flat cakes and pies. But lord will they win over your taste buds and still have you fitting into your skinny jeans. I invite you all to try out some recipes, adapt a couple where you see fit and above all, learn to enjoy the lovely taste of freshly baked, healthy goods.
Posts tonen met het label almond. Alle posts tonen

dinsdag 29 oktober 2013

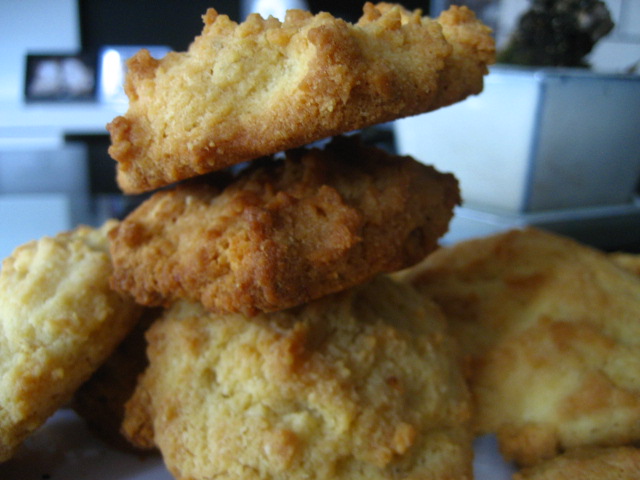
Almond cookies with chocolate

NO ADDED FAT!

I can't write it any bigger without it being stupid but that is what makes these cookies so great. They are low in fat, yet very tasty and sturdy so you can take them along and enjoy them the entire day.

I was gonna take pictures, but then it got dark, and then  I forgot....and then I ate them all.
Woops :D

Ingredients:

For the cookies:
200 gr ground almonds (almond flour)
100 gr icing sugar
1 tsp liquid honey
4 egg whites
A pinch of salt

For the chocolate:
4 egg yolks
1 tbsp liquid sweetener
2 tbsp no-added sugar cacao powder

Way to do it:

  1. We start with the cookies. Add the almond flour, honey and icing sugar in a bowl.
  2. With a fork, lightly wish 2 egg whites until the liquid turns white. Add it to the almonds and stir with a wooden spoon.
  3. Whisk the remaining 2 egg whites with a pinch of salt until you can turn the bowl upside down. Then add to the batter and gently fold it in.
  4. Line a baking tray with baking paper and evenly place out the dough. Mine are about a full tablespoon each. Bake for 10 minutes at 180degrees C.
  5. Now for the chocolate. Add all the ingredients to the 4 egg yolks and whisk. Let rest until the cookies come out.
  6. When the cookies have baked for 10 minutes, take them out and add a dollop of chocolate mixture to each cookie. The chocolate will run over the cookie making it look good but not 'too perfect'. I don't do pretty pretty, I do yummy yummy!
  7. Place the tray back into the oven and let bake for another 5 minutes. 
  8. When they are done, let them cool before you move them to a plate or stuff them into your mouth.

Enjoy
xx

zaterdag 15 juni 2013

My version of a classical French Yogurt cake

Hello everyone, summer has arrived...oh yes it has! Pretty soon I'll be using this season's best fruit to make light and healthy desserts, but first a twist on the classical French Yogurt cake.

What's the twist you ask? Well, alcohol and soy yogurt. I like yogurt...but there's something about the plain yogurt Alpro soya makes that's just amazing. It has a gentle taste, very few fat and low sugar so all in all, it's pretty great. Healthy and tasty, that's what we're going for here.


Just like all my other recipes, this is so easy, a child could do it. The cake itself might look boring and simple, but trust me, this lovely thing will delight both your and your family's taste buds.

As I'm typing this, I'm starting to smell the batter turning into something amazing in the oven...so let's get on with the recipe.


Ingredients:

2 portions of 125ml plain yogurt (I used alpro soya)
2 eggs
1 tsp vanilla essence
3 tbsp Amaretto
2 cups op 125ml almond flour
liquid sweetner

About 10 crushed cookies (I used speculoos)

Way to do it:

  1. Preheat the oven to 180degrees C and line the bottom of a round, spring-form cake tin with bakingpaper. Grease the sides with vegetable oil.
  2. In a bowl mix yogurt with eggs, vanilla essence, amaretto and the sweetner. The sweetner is, as always, to your liking. I used about 2 tablespoons. Bear in mind that the ameretto is pretty sweet too so you might eveb omit the sweetner if you prefer.
  3. Use your 125ml cups to measure the almond flour. Top both of them off with flour and add to the mix.
  4. Mix till everything is well combined and allow yourself a little taste. Taste good doesn't it. Would it be wrong to just eat this as a sauce....
  5. Enough daydreaming. Pour the batter into the baking tin and lightly sprinkle your crushed cookies over the top.

  6. Bake in the oven for 20 minutes or until an inserted toothpick comes out clean.

    Let cool for about 5 minutes before you take it out the tin. The cookies will have been baked into the top, making for a lovely, crunchy, topping.

    This doesn't make a very big cake, so feel free to double the portions to make a bigger cake.

    For extra yumminess, you could slice the cake in two and add a thin layer of strawberry jelly. However, I don't really feel like it needs it. This cake a light, slightly boozy version of a classic French yogurt cake. And remember, no added sugar, no butter but bursting with flavor!

    Enjoy
    xx

zondag 10 maart 2013

Chocolate Birthday Cake

Hi Everyone,

I'm back with my first cake recipe so read on if you enjoy delicious jet low carb desserts!

It was my birthday on the 8th of march and for a dinner celebration on the 9th at my family's house, I really wanted to indulge in a nice dessert. One I could share with the entire family but that didn't leave me feeling like a cheater. Therefore, I took out my favorite cakes cookbook (this one, an old one but so good with many lovely and easy recipes) and adapted it to a low carb successful formula.

I hope you like it. This makes a very dense cake so you probably won't need to eat more than one piece.

Ingredients for 1 cake:

100gr almond flour
1 tbsp instant coffee powder
3 big eggs
2 tbsp sweetener (or to your taste)
60gr dark chocolate
60gr ground coconut
a couple of drops vanilla essence
1 tsp baking powder and salt to match it

175g cream cheese
15ml Amaretto
2 tbsp sweetener (or to your taste)
2 tbsp soft butter


How to do it:

  • Preheat over to 190 degrees C.
  • Separate the whites from the yolks and beat the whites stiff.
  • In the bowl with the yolks add the sweetener, melted chocolate, coffee powder, baking powder, vanilla essence, ground coconut and almond flour.
  • Gently fold in the egg whites. This will give the cake it's height and make your dough more moist.
  • Bake for about 25minutes at 190 C. Check while it's cooking because all ovens are different.

  • Afterwards let the cake cool and in the meantime we can make the filling.

  • Mix the cream cheese with the sweetener, soft butter and add the Amaretto.
  • I would suggest putting it in the fridge to harden. This will make the smearing a lot easier.

  • At this point you could add some extra topping. I didn't because the cake is moist enough. But anyways, here's the ceipe if you want to do it.
    You'll need:
    120gr soft butter
    3 tbsp sweetener
    3 tbsp cocoa powder
    1 tsp vanilla extract
    1 egg yolk


  • Whisk the butter in a bowl to loosen it up and make it creamy.
  • Add the sweetener, vanilla extract and cocoa powder.
  • The egg yolk is optional but I would suggest you use it. It gives the topping a nice glaze.

  • Now it's time to assemble the cake.

  • Cut your cake in half horizontally, making two nice flat discs.
  • Generously add the cream cheese filling and put both halves back together. Don't push them down, you want the extra height.
  • Finish with the optional topping. You can decide wither you want a thick layer on top or if you want to wrap the entire cake in chocolaty goodness. It's your cake so do as you please.

  • And there you have it. A wonderful yet low carb choclate cake for the entire family to enjoy. The carb amount on this one is higher than my other recipes, but hey, It's my party and I'll indulge if I want to.

    Till next time,
    Enjoy
    xx

    zondag 3 maart 2013

    Almond Macadamia Cookies

    Hi Everyone,

    I'm back with a new recipe!
    After my hazelnut cookies really did the trick of keeping my sweet cravings in check, I decided I needed more! I made another batch of cookies because I love how they are so low in carb and I don't have to feel bad for indulging.
    My cookie routine: I have one in the morning before my meals with a nice cup of strong coffee and in the evening, I have another one (or two...) with some lemon tea and really, it doesn't even feel like I'm dieting.

    Ingredients:

    2 large Eggs
    150 gr butter
    a tsp vanilla extract
    5 tbsp sweetener (or to your taste)
    200 gr Almond flour
    1 tsp baking powder
    dash of salt
    60gr Macadamia nuts, chopped

    How to do it:

  • Preheat over to 190 degrees C.
  • Separate the whites from the yolks and beat the whites stiff.
  • In the bowl with the yolks add the vanilla extract and butter.
  • Add the sweetener and mix again.
  • Add the baking powder,salt and almond flour.
  • Gently fold in the egg whites. This will give your cookie it's height.
  • Finally, gently stir in the chopped nuts

  • Divide the dough evenly into about 15 little heaps of dough and place them on a cookie sheet. Make sure they are far enough apart because they will spread out a little. Bake for about 12 minutes at 190 C for soft cookies, go to about 17 minutes for crunchier ones.

    Afterwards let them cool before you move them to a plate.


    Depending on how big you make them and which ingredients you use, this entire recipe contains about 17gr of carbs. So that's about 1,2 gr of carb per cookie!

    Leave them overnight because I found the taste and texture is better the next day.

    Note: You can also add some white chocolate chunks but I couldn't find any with reduced calories. Now I found some on so I'll be back soon with some white chocolate creations :D

    Note 2: For added yummyness, you could smear the top of the cookies with some low sugar jam. Only do so right before you're about to eat them because otherwise, they will make the cookie too mushy.


    Enjoy
    xx

    zaterdag 23 februari 2013

    Crazy Cauliflower Chocolate Brownies

    There are those out there on the lovely internet that are truly magnificently insane. And amongst them is this woman. She has a recipe, so crazy that many would shy back to try it. But I'm telling you, you simple have to try it. It takes a little bit more work than I'd normal be up for but it's so worth it!

    When you are craving, and you need that little bit of chocolate but without messing up your diet, this is the way to go. You can find the original recipe here but below is my version.

    Ingredients:

    250 gr raw cauliflower
    150 ml almond milk (I used Alpro Soya)
    80 gr dark chocolate (I got Stevia chocolate at the local Bio shop)
    100 gr cup butter
    3 tbsp cream cheese
    3 eggs
    100 gr ground almonds (almond flour, also at the local Bio shop)
    4 tsp cocoa powder
    3 tbsp sugar equivalent
    1 tsp baking powder
    pinch of salt to make the baking powder work
    50 gr coconut flour(optional)
    A few drops op Vanilla essence (optional)

    Directions:

    1. Puree your raw, washed, cauliflower and add to it the almond milk. Make sure its completely smooth and that there are no chunks.  
    2. Melt the butter and chocolate. I just did it in the microwave. Less clean-up after :D   
    3. Mix the melted butter and chocolate with the cauli and milk mixture.  Give it another good blend.  
    4. Add the eggs and again stir it till everything's mixed.  
    5. Now one by one, add all of the dry ingredients into the bowl with the mixture.  Stir after each addition.
    6. I also added about 3 drops of vanilla essence. You don't have to, but I found it gave the brownies an extra 'sweet' flavor without adding extra carbs.
    Grease a baking pan and spread the batter evenly into it.  Bake in a pre-heated oven at 180 degrees C for about 35 minutes. Near the end, poke it with a knife. If the knife comes back clean, then you have a winner! Cut in cute little squares.
    Note: They are quite brittle when they are still warm so I'd advise you to let them cool before you cut.

    And there you have it, insane isn't it?
    Don't tell people what's in them. Wait till they compliment you on how the brownies taste and then tell them they that just ate vegetables. They won't believe you... but you and I now know that it's true.

    Sorry I didn't include pictures. They were eaten before I had the change :D

    Enjoy
    xx

    Low Carb Red Velvet with icing

    Hi everyone, here goes for my first recipe!

    2 Weeks ago on friday, Me, my brother and my sister had a sibling day planned. We went to the museum and afterwards we played boardgames at my brother's house. Good ol' family bonding time.

    However, I knew it would be hard for me to say no to delicious snacks sush as cookies and chips...so I made my own snacks. I adapted the red velvet recipe from my Hummingbird Bakery cookbook to make it very low in carb. Even with the added icing, it's only about 2 carbs per cupcake. So don't be shy and grab another one before they're all gone.

    I wouldn't say they are as good as regular 'real' red velvet cupcakes, otherwise life wouldn't be fair. But my brother did eat about 5 of them so they couldn't be bad right :D

    Ingredients:

    for the cupcake
    100ml almond milk
    120g butter
    About 3 tbsp sweetener
    2 large eggs
    20 g cocoa powder
    40ml red food coloring (doesn't add to the taste but it can't be red velvet without adding a little red)
    A few drops vanilla essence
    300 g almond flour
    Half a tsp of baking powder
    A finch of salt to make the baking powder work
    for the icing
    250g cream cheese (try and look for the one with the least carbs. I used a bio non-fat one)
    3 tbsp sweetener

    Way to do it:

    Pre-heat your oven to 190 C and place your cupcakes molds in a special cupcake tin. That makes them easier to carry and they will keep their lovely shape.
    Use a mixer to mix the butter and sweetener. To this you add your eggs and mix again.
    Add your coca, red food coloring and the vanilla essence.
    Now you can add in the almond flour and the milk.
    At the very end you add the baking powder with a pinch of salt. Mix everything very well for a couple of minutes.
    Divide evenly over the cupcake papers and bake in the oven for about 18 to 20 minutes.
    While they are baking, you can make the icing. Simply add the sweetener to the cream cheese and mix it till it's smooth.
    When the cupcakes are done, let them cool completely and then add the icing. You can decorate with a dash of cocoa powder if you please.

    Note: all sweetener is different so try as you go. Too much sweetener will make your creation taste too 'chemically' so I would advise you use my amounts as guidelines but see what works for your sweetener.

    Enjoy
    xx