About me

Mijn foto
I've changed my life around and now I am enjoying The Lighter Life. I love cooking and especially baking lovely desserts, but I wanna stay away from little no-no's like too much sugar and fat. I live in Belgium where the 'low-carb and low-fat movement' is just starting to begin so I found myself looking for recipes with easy to find ingredients and metric cooking measurements. Since they were hard to find, I decided to make my own! My desserts may never win beauty contests, for baking with bio ingredients will mostly give you flat cakes and pies. But lord will they win over your taste buds and still have you fitting into your skinny jeans. I invite you all to try out some recipes, adapt a couple where you see fit and above all, learn to enjoy the lovely taste of freshly baked, healthy goods.
Posts tonen met het label light. Alle posts tonen

zondag 17 november 2013

Cinnamon Cakes


Two reasons why this next creation came into place.

                       1 = I had just bought a new silicon baking tray and I wanted to use it.
                       2 = I've been wanting to make something heavy with cinnamon. 


It can be as simple as that. So I dove into the kitchen, added some of my favorite ingredients in a bowl and whisked away. With no added fat, this cake is easy on the hips yet very yummy on the tongue.


Ingredients:

3 tbsp dark brown unrefined sugar
3 tbsp buckwheat flour
1 tbsp cinnamon
3 medium eggs
A handful of your favorite nuts (I used peanut)
160 ml soy milk

Way to do it:

  1. Combine all dry ingredients (not the nuts)
  2. Add the eggs and whisk till everything is combined.
  3. Add the soy milk and whisk for a good minute.
  4. Plop in the nuts and give it a stir with a spoon.
  5. Divide over your tin and bake, in a pre heated oven, at 200 degrees for about 25 minutes.
  6. Let cool before you transfer them.


This recipe is a little bid different from my usual ones because of the soy milk. This time the batter is very liquid, but a longer baking time still results in a delicious and light cake.

To make it sweeter, you can top with some powdered sugar dissolved in water, making a nice glaze, or you can dip them into cinnamon sugar (just mix some cinnamon with white sugar)

Enjoy
xx

zaterdag 9 november 2013

Moist Chocolate Cake

A cake so moist, it sticks to your fingers and everything it touches. That's my latest quick and simpel recipe!


It was late, I was watching a movie and I suddenly just needed something sweet, something gooey. This moist chocolate cake was the result. I didn't really think about it. I just threw some ingredients in a pot, whisked them together and voila.

I love it when my weird impromptu kitchen adventures turn into something yummy and lighter than store bought desserts. 

Ingredients:

1 ripe banana, mashed
3 medium sized eggs
100 ml low fat cream cheese
1,5 tbsp dark brown sugar
50 gr milk chocolate, melted
50 gr almond flour

Way to do it:

  1. I can't make it any easier....just whisk all the ingredients together!
  2. Put the batter in a pie dish and bake for about 20 minutes in a pre-heated oven at 200 degrees.
  3. After 15 minutes of baking, you can poke the cake with a skewer. If it comes out clean, take the cake out. We want it to be as moist as possible.
  4. Let cool or give into your urges and eat it while it's warm. 

I enjoyed my first piece with some light vanilla ice cream. The warm chocolate with the cold ice cream was just heaven. In the morning, I enjoyed my second piece with a cup of breakfast tea. If possible, it was even better due to the overnight time of letting the cake set.

No added fat, but low fat cream cheese,
         A ripe banana for the sweetness, making the addition if sugar minimal,
                                                    No white flour but a little bit of almond flour for body,
                                                                                               And some milk chocolate for the taste....

Enjoy
xx

dinsdag 29 oktober 2013

Almond cookies with chocolate

NO ADDED FAT!

I can't write it any bigger without it being stupid but that is what makes these cookies so great. They are low in fat, yet very tasty and sturdy so you can take them along and enjoy them the entire day.

I was gonna take pictures, but then it got dark, and then  I forgot....and then I ate them all.
Woops :D

Ingredients:

For the cookies:
200 gr ground almonds (almond flour)
100 gr icing sugar
1 tsp liquid honey
4 egg whites
A pinch of salt

For the chocolate:
4 egg yolks
1 tbsp liquid sweetener
2 tbsp no-added sugar cacao powder

Way to do it:

  1. We start with the cookies. Add the almond flour, honey and icing sugar in a bowl.
  2. With a fork, lightly wish 2 egg whites until the liquid turns white. Add it to the almonds and stir with a wooden spoon.
  3. Whisk the remaining 2 egg whites with a pinch of salt until you can turn the bowl upside down. Then add to the batter and gently fold it in.
  4. Line a baking tray with baking paper and evenly place out the dough. Mine are about a full tablespoon each. Bake for 10 minutes at 180degrees C.
  5. Now for the chocolate. Add all the ingredients to the 4 egg yolks and whisk. Let rest until the cookies come out.
  6. When the cookies have baked for 10 minutes, take them out and add a dollop of chocolate mixture to each cookie. The chocolate will run over the cookie making it look good but not 'too perfect'. I don't do pretty pretty, I do yummy yummy!
  7. Place the tray back into the oven and let bake for another 5 minutes. 
  8. When they are done, let them cool before you move them to a plate or stuff them into your mouth.

Enjoy
xx

zondag 13 oktober 2013

Delicious Pizza without the guilt!

One of the best things out there...is pizza. Not only is it simply delicious, it's also fun to eat and share with friends. But it's also one of the worst thing out there when you're thinking of fat and calories. So therefore, my way of making a pizza which will leave you with a great dinner and none of the guilt.

You can always buy one of those ready-made crusts, but they do tend to cost a pretty penny, so why not make your own. I promise you, it's so easy and simple. I wouldn't add it to my blog if it wasn't!


Also...no yeast! I don't get yeast, never have. It's one of those ingredients you would buy one time, use like half of it, and then after a year, you throw it out when it becomes hard as rock and you need the fridge space.

So, I present you a simple pizza crust with no fuss but packing in taste, topped with delicious ingredients, all rolling in to a great dinner to enjoy with a good movie on series marathon.

Ingredients for 1 medium pizza:

for the crust
200 gr flour
pinch of baking powder
pinch of salt
pinch of garlic powder
pinch of dried basil
90ml water
extra: 1tbsp vegetable oil


for the pizza
a half yellow bell pepper
a half red union
3 tbsp tomato sauce
2 slices of chicken
A handful of grated cheese
extra: your favorite spices. I used Cajun and simple chicken spices

Way to do it:

  1. Add all dry ingredients for the crust in a bowl and mix with a spoon. Then add the water. You might not need all of it, so add as you knead and add some more of it's too dry. The dough shouldn't be too sticky but should have more of an elastic texture. Spread out on a baking tray lined with a baking sheet and flatten until you get a nice round pizza. Curl back the outsides a little to get that crunchy side crust.
  2. Drip some oil on the inside of the pizza and move it around. This will prevent the base getting soggy with the tomato sauce. Such a marvelous little trick.
  3. Then starts the fun part. The topping! I added half a yellow bell pepper, chopped into small cubes, half a red onion, chicken slices you would normally put on your sandwich but I cut them into little bits ass well and sprinkled them over the vegetables. Finally comes the cheese. Of course, the more cheese you add, the more high in fat it will become so cheese in moderation.
  4. I also topped with some herbs so give the pizza an extra little spicy kick.
  5. Bake in a preheated oven on 240degrees C for about 12 minutes. Or until the cheese is melted and the crust is crunchy.

To be honest, I'm actually kind of surprised at how good the base turned out. I was expecting a floppy crust, but it's was strong, crunchy and very yummy.

The good thing about making the crust yourself is that you can add flavor. I used garlic and basil, but you could also go with grated cheese, paprika powder, chilli or even sugar when you're going for a dessert.

Enjoy
xx 

woensdag 9 oktober 2013

Lemon Bars with Cream Cheese

Hi everyone.

I've been wanting to make lemon bars for so long, but I never found a recipe that ticked off all my criteria. For a recipe to be Stevie Friendly, it needs to be

- easy and no fuss
- not drenched in bad fat or loaded with sugar
- not take to long because you know I have no patience

and

- it must not make a mess of everything because I hate, hate, HATE doing dishes.

So, I simply decided to dive in, head first, and create my own lemon bars.
And I'm so happy I did.


Ingredients:

For the base:
150 gr flour
100 gr soft coconut butter (normal butter is fine too)
A pinch of salt
2 tbsp sugar
2 tbsp cold water
1 tsp lemon juice

For the filling:
3 tbsp low fat cream cheese
2 eggs
2 tbsp liquid sweetener
Juice of 1 lemon
100 gr flour


Way to do it:

  1. We start with the base. Combine all dry ingredients in a bowl and stir with a spoon to combine. Add the coconut butter and use your hands to 'melt' it into the mixture. It will become very crumbly and dry. Add the lemon juice and water and use that liquid to form a dough. Roll the dough into a ball, put it in cling foil and let rest in the fridge for at least 30 minutes.
  2. Now we make the filling. Add the cream cheese, eggs, liquid sweetener and lemon juice into a bowl and whisk until combined. Add the flour and make sure there are no lumps left. It will be very liquid but don't worry, that way our crust will soak it all in. Leave it into the fridge until you are ready to use it.
  3. After the crust has rested for 30 minutes, take it out and line a baking tray with baking paper. Roll out the dough and bake in a pre-heated oven on 180degrees Celsius for about 10 minutes.
  4. Take the baking tray out and pour the filling over the crust. Bake again for another 10 minutes.
  5. Take out of the oven and let them cool before you cut them. Transfer to a plate and they are best if you keep them in the fridge.
And these people, are no fuss, no muss, deliciously low sugar Lemon Bars.

I must admit, you can't call these low in fat...compared to stuff you would buy in the store yes, but not to other stuff you can find on my website. However, I did use coconut butter and some sources say it's the 'healthiest' butter there is. But it's still butter off course, this isn't a perfect world :-(


It was my first time making these, so it's still a work in progress. Next time, I'm going to add some cacao powder to the base and I'll prob add some more lemon juice because in my opinion, they could be a little more sour.

Keep checking back for new recipes and let me know what you think.

Enjoy
xx

zondag 7 juli 2013

Soft serve banana and peanut butter ice cream

This one is a quick and easy way to deal with overripe banana's (which I sorta always seem to have) and to fulfill your cravings of ice cream on hot summer days. With 25 degrees outside (don't laugh, for Belgium that's insane) this soft serve banana and peanut butter ice cream hits the spot on all levels.

And a big plus, you don't even need fancy tools for it. Forget expensive ice cream makers, all a girl really needs is her blender.

Ingredients:

2 frozen banana's, peeled and cut into small pieces (peel them before you freeze!)
A dash of soy or regular milk to help your blender move things around
Half a tablespoon of peanut butter

Way to do it:

  1. Combine all ingredients in the blender and blend to a thick, ice cream texture. If too dry, add a little more of milk. Because the banana's are so ripe, you don't need to add extra sweetener.
  2.  
And it's just that simple. You can whip this up in under 5 minutes. This is a generous serve for one so just multiply the ingredient's if you want to let other people enjoy this delicious, low fat, summer treat.


Feel free to add extra ingredients but make sure the mixture doesn't get too liquid. Because it's a soft serve, the ice cream melts very quickly so eat right away.

Enjoy
xx
     

    zaterdag 22 juni 2013

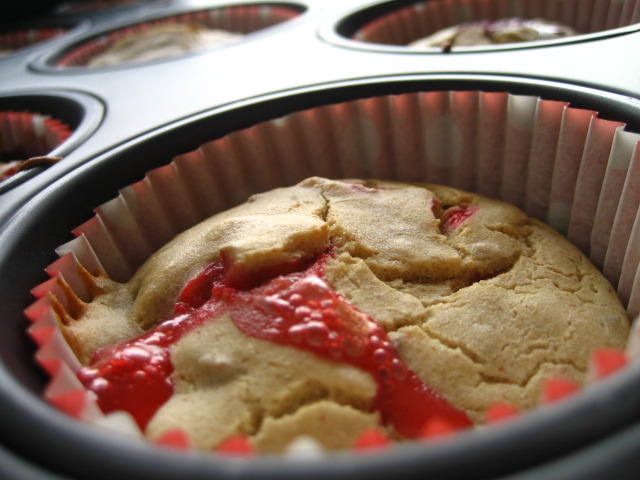
    Straw- and blueberry buckwheat muffins

    No muss, no fuss, just easily made stuff! I bring you a healthy muffin you can whip up in about 20 minutes...and that's counting baking time.

    This will be my second recipe with buckwheat after the first one went down so great. My scones were great, and these muffins might even be better!

    Browsing through the ingredients, you might notice I didn't use any...let me repeat, ANY butter. I wanted to make a muffin very low in fat so I wouldn't have to feel bad when I wanted a second one...or third...or basically finish the entire batch in 1 day. Yes...I can't control myself from time to time.

    Because these babies hold no fat, they are dense and won't come out of paper muffin cups very easily. Therefor I would suggest you make these in silicone cups which you can lightly coat in vegetable oil.

    Eat it with a dollop of Greek yogurt or with some agave sirup drizzles over it or just be lazy and eat it like it is, you won't be disappointed either way.

    Ingredients:

    200gr buckwheat flour
    2 eggs
    150 ml low fat plain yogurt
    1 tsp vanilla essence
    3 tbsp liquid sweetner
    3 tbsp flax seeds 60 gr strawberries
    60 gr blueberries

    Way to do it:

    1. In a bowl, mix all ingredients apart from the fruit. Mix until everything is combined. It will be a thick, glue like batter.
    2. To easily remove the crown of a strawberry, use a straw, it's such a great trick. Cut up the strawberry in pieces and add, with the blueberry, to the mix. Be careful not to smash the fruit as you mix the batter. I would suggest folding them in with a spoon.
    3. Divide over your cups. It's okay to fill them up. The batter doesn't rise much.
    4. Bake for 15minutes in a 200degrees oven.
    5.  
      I love how the strawberry and blueberry make for different colors. So cute and colorful and full of flavour!

      Enjoy
      xx